Ringworms

Ringworm

Ringworm (dermatophytosis) is a fungal infection that can affect the hair, skin or nails of cats, dogs and humans. It is the most common contagious skin infection in cats. In humans, the infection often causes classic ring-like lesions, but these are seen less commonly in cats and dogs. In most patients, ringworm is self-limiting; that is, it will self cure over time. However, because this infection can be transmitted from cats and dogs to other animals and also to people, every pet owner should be aware of the symptoms, transmission and treatment of ringworm.

Where is the fungus found? 
Several different fungi found throughout the world can cause ringworm, however, the vast majority of cases in cats and dogs are caused by Microsporum canis, Microsporum gypseum, or Trichophyton species. The fungus is most commonly found either on an infected animal or in the living quarters of infected animals. Spores from infected animals can be shed into the environment and live for up to 24 months. Humid, warm environments encourage growth of the fungus. Spores can be on brushes, bedding, furniture, or anything that has been in contact with an infected animal or the animal’s hair. Cats can be asymptomatic carriers and harbor and shed the organism without showing signs of infection. Animals thought to be chronic carriers can be routinely cultured to determine if they are actual carriers.

How is ringworm transmitted? 
Ringworm can be transmitted by direct contact with fungal spores. These spores can be found on a infected animal, on infected grooming equipment or brushes, in a contaminated boarding facility or cattery, or in the environment where an infected animal has visited. Because ringworm spores can survive for long periods in the environment your cat can contract ringworm from just about anywhere other dogs or cats have been. Fortunately, most healthy adult cats have some natural resistance to ringworm and never develop symptoms from the fungus. Young cats under a year old are most often infected. Cats with a suppressed immune system from diseases or overuse of steroids are also more susceptible to contracting the disease. Senior cats, free-roaming cats, and those who are under stress, malnourished or have other diseases such as parasites or viral infections also appear to be at increased risk. In addition, genetic factors may play a role, as Persians appear to be more susceptible to ringworm.

What are the signs of ringworm? 
Cats with ringworm may have skin lesions which can appear different depending on where they occur and how long they have been present. The classic symptom is a small round lesion that is devoid of hair. The lesion will often have scaly skin in the center. Small are often found in the lesion. The lesion may start as a small spot and continue to grow in size. The lesion may or may not be irritated and itchy. Lesions are most common on the head, ears, and tail. In some infections, the fungus will not be in a circle and can spread across the face, lips, chin, or nose and look like an autoimmune disease or other generalized skin disease. Occasionally, the infection will occur over the entire body and create a generalized scaly or greasy skin condition. Hair loss may be mild or severe. In some cases the first sign may be excessive shedding, and hairballs may occur when large parts of the body are affected. Scratching at the ears is also common. Ringworm can also occur in the nails, often causing them to grow malformed.

How is ringworm diagnosed?
Ringworm cannot be diagnosed by simply looking at a lesion, but at least one of several testing methods must be used. One method is through the use of a specialized black light called a Wood’s lamp. Several species of the ringworm fungus will glow a fluorescent color when exposed to a Wood’s lamp. However, it is estimated that up to half of the most common species of M. canis do not fluoresce under a Wood’s lamp, and T. mentagrophytes does not fluoresce. Other substances may fluoresce and cause a false positive reading. In addition, a healthy animal may have spores on his coat but may not have an active infection. So, this is not the most accurate method.

Another method for identifying ringworm is to pluck hairs from the periphery of the lesion and examine them under the microscope. Between 40% and 70% of the infections can be diagnosed this way.

The most reliable way to identify a ringworm infection is by collecting scales and crust from the skin and coat and performing a fungalculture. Your veterinarian will commonly use a toothbrush to collect the sample of hair and scales from the cat to culture. There are special culture mediums designed specifically for identifying ringworm infections. Your local veterinarian can easily perform this routine culture.

Cats with ringworm should always be evaluated for underlying disease(s) that may have made them more at risk for this fungal infection.

How is ringworm treated?
In healthy shorthaired kittens and cats with small isolated lesions, the lesion is often treated with a topical cream containing an antifungal such as miconazole or thiabendazole. In addition, it is important to treat any underlying conditions, provide good nutrition, and prevent the spread to other animals and humans.

In more severe cases, a combination of oral and topical treatments is generally used. Often the lesions are clipped so the topical treatment can reach the skin. Many veterinary dermatologists feel that all longhaired cats must be shaved completely to achieve any success with ringworm treatment. Care should be taken not to irritate the skin when clipping, as this may cause the infection to spread. Also, realize that the clipped hair, clippers, and any grooming instruments that come into contact with an infected animal will harbor the spores and must be heat or chemically sterilized before being used on any other animal. The recommended topical treatment is lime sulfur dips. These dips have a bad odor and can temporarily turn the coat a yellowish color, but they are extremely effective and should be used if recommended by your veterinarian.

Alternatives to lime sulfur dips include miconazole shampoos and rinses, and enilconazole (available in some countries). Oral antifungal agents are generally recommended for any cat with severe generalized lesions, for longhaired cats, and in cases where the nails are infected. Oral antifungal agents may also be recommended when there is no response to topical therapy after 2-4 weeks of treatment. Itraconazole is the preferred drug of choice, and terbafine may also be used. Griseofulvin is another alternative, but has a higher risk of adverse effects.

Treatment is generally continued until there have been two negative cultures a week apart.

Some veterinarians have recommended using Program® (the once-a-month flea pill) at a higher dose to treat ringworm in cats, but it has been shown to be ineffective against ringworm.

How can ringworm be controlled in the environment?
Because the ringworm fungus can survive for such long periods in the environment, it is critical that an effective cleaning plan be used in all infections. Spores are very light and are carried in the air, so wherever there is dust and hair, there may be spores. Whenever cleaning, avoid sweeping and other types of cleaning that may actually spread spores through the air. Vacuuming, damp mopping and using a Swifter-type mop are generally recommended. Carpets should be steam cleaned and disinfected. Heating and cooling ducts and furnaces should be professionally vacuumed and filters replaced if a culture from the ducts comes back positive. Furniture and drapes should be vacuumed and the vacuum cleaner bags should be disposed of promptly. Housing units that contain wood or rusty metal should be re-painted. After vacuuming or mopping, clean with water and a detergent solution. Then, use bleach diluted to 1:10 with water and left on for at least 10 minutes to kill most of the organisms. All grooming tools, bedding, kennels, cat carriers, and cages should be thoroughly cleaned and disinfected with bleach, as well.

How can ringworm be controlled in catteries?
Some of the most difficult cases of ringworm come from catteries or small breeders, particularly those with Persian or Himalayans. Eliminating ringworm from these units can take months to years of diligent treatment. Remember that it will take a complete commitment to properly eliminate ringworm from a cattery. The owner must be willing to devote a large amount of time and make some difficult decisions if success in treatment is to be achieved.

There are several different approaches to controlling and eliminating ringworm in a cattery. The first approach includes total depopulation of the cattery, decontamination of the facility, and repopulating with only animals that test negative on three consecutive cultures performed at two-week intervals. The second approach is to treat the entire colony and facilities with appropriate topical medications, systemic therapy, and environmental cleanup. The colony is isolated and breeding and showing are interrupted. The third option would be to treat only infected kittens. This third option is only suitable for a breeder that produces kittens for the pet cat market and usually is not recommended for most breeders. Breeders will need to work very closely with their veterinarian to develop the best program for their facility.

Cultures should be performed on new cats coming into the cattery or returning from a show or a breeding. They should be quarantined and dipped once with lime sulfur. Since dogs and humans can carry ringworm into a cattery, both human and canine visitors should be kept at a minimum.

How is ringworm prevented?
Ringworm is a disease where an ounce of prevention is truly worth more than a pound of cure. If you have cats in your home, be very careful about bringing a new kitten into your household. Cat shows, kennels, and grooming facilities can also be a source of infection and caution should be used when exposing your cat to these places. Breeders of Persians and Himalayans need to be especially cautious about bringing any new animal that has not been cultured into their facility. If any sign of ringworm is seen, make sure you isolate the infected cat and seek prompt veterinary attention.

Is ringworm transmissible to people?
Yes. Ringworm can be transmitted between cats and people. Persons with suppressed immune systems, such as those with HIV infections or AIDS, and those undergoing chemotherapy may be especially vulnerable. Persons should wear gloves when handling affected animals and wash hands well afterwards. If you contract ringworm, treat with an OTC anti-fungal, such as Lotrimin.

Plants Poisonous to Cats

Provided by The Animal Planet


Some plants are more toxic than others, so we suggest that you be particularly aware of the dangers associated with these common houseplants.

  • Lillies (Lilium spp). Although the toxin involved has not been identified, one bite of a leaf or a taste of the pollen from a plant in the lily family can cause lethargy and vomiting within 12 hours of ingestion. If not treated, your cat may go into kidney failure.
  • Sago Palm (Cycas revoluta). Once exclusively an outdoor plant, the sago palm has recently begun making an appearance on windowsills and coffee tables. The entire plant is poisonous to cats, but the seed pod, sometimes called the nut, contains the greatest amount of toxin. Just a few nibbles can cause vomiting, diarrhea and even seizures. If left untreated, cats can experience liver failure.
  • Calcium Oxalate plants. These include dieffenbachia, philodendrons and Chinese evergreens to name just a few. Insoluble calcium oxalate, microscopic crystals that look like needles, is present throughout these plants. One bite and the needle-like crystals shoot into a cat’s gums and tongue. Symptoms include drooling and vomiting. To reduce irritation, give your cat goat milk or other calcium-containing substances, such as yogurt. If enough mouth swelling occurs, breathing could become difficult, but this is rare.
  • Dracaena. Over 40 species are included in this family of popular houseplants, including the red-edged Dracaena, the dragon plant, and the Dracaena Janet Craig. Cats that eat the long, skinny fronds that are typical in the Dracaena plant family will vomit, sometimes with blood, become depressed and lose their appetites. Kittens can get a little wobbly and appear to be drunk. Luckily, these plants are not usually lethal and symptoms should disappear in 12 to 24 hours.
  • If your cat decides a houseplant is put to much better use as food than as decoration, your first step should be to call your vet. She will want to know what plant ended up in your cat’s stomach. Use a smartphone or digital camera to take a close-up picture of the plant and email it to your veterinarian for identification. If you’re not sure which plant your cat has gotten into, get your pet to your vet as quickly as possible so that the vet can observe any symptoms for clues.

    If the plant is toxic, your vet may suggest inducing vomiting at home or giving your cat activated charcoal capsules. Activated charcoal, which can be purchased at a pharmacy, binds to toxins while still in the stomach, preventing absorption into the blood stream.

    It’s a good idea to have activated charcoal on hand for emergencies, but you should never attempt any home remedy without contacting your veterinarian first. Making a cat vomit or swallow pills can be tricky, and activated charcoal capsules are not as concentrated as the liquid version used by veterinarians. Getting to the vet should be your priority. If something as toxic as a lily is ingested, expect your cat to be placed on intravenous fluids for a couple of days to flush out the toxins.

    The ASPCA’s Web site has a comprehensive list of toxic and non-toxic plants. The center is also staffed with veterinarians available to answer questions if you suspect your cat has ingested a poisonous substance. The 24-hour emergency poison hotline number is 1-888-426-4435. A fee is required but may be well worth it for your peace of mind or your cat’s life.

    Nail Trimming 101

    Nail Trimming 101

    Provided by ASPCA

    Make manicures enjoyable and easy for both you and your cat
    Does your kitty disappear when the clippers come out? Do you have to wrap her in a towel to give her a manicure? According to our behavior experts, calm, enjoyable nail-trimming sessions are not only possible—that’s how they should always be! Check out the following tips for getting kitty to relax while you trim, turning nail-clipping sessions into enjoyable together time.

    Setting the Mood
    Ideally you should introduce your cat to nail clipping when she’s a kitten. Choose a chair in a quiet room where you can comfortably sit your cat on your lap. Get her when she’s relaxed and even sleepy, like in her groggy, after-meal state. Take care that she isn’t able to spy any birds, wild animals or action outside nearby windows—and make sure no other pets are around.

    Make Friends with the Paw
    Gently take one of your cat’s paws between your fingers and massage for no longer than the count of three. If your cat pulls her paw away, don’t squeeze or pinch, just follow her gesture, keeping in gentle contact. When she’s still again, give her pad a little press so that the nail extends out, then release her paw and immediately give her a treat. Do this every other day on a different toe until you’ve gotten to know all ten.

    Get Acquainted with the Clipper
    Your cat should be at ease with the sound of the clippers before you attempt to trim her nails. Sit her on your lap, put a piece of uncooked spaghetti into the clippers and hold them near your cat. (If she sniffs the clippers, set a treat on top of them for her to eat.) Next, while massaging one of your cat’s toes, gently press her toe pad. When the nail extends, clip the spaghetti with the clippers while still holding your cat’s paw gently. Now release her toe and quickly give her a treat.

    Never Cut to the Quick 
    The pink part of a cat’s nail, called the quick, is where the nerves and blood vessels are. Do NOT cut this sensitive area. Snip only the white part of the claw. It’s better to be cautious and cut less of the nail rather than risk cutting this area. If you do accidentally cut the quick, any bleeding can be stopped with a styptic powder or stick. It’s a good idea to keep it nearby while you trim.

    Time to Clip
    With your cat in your lap facing away from you, take one of her toes in your hand, massage and press the pad until the nail extends. Check to see how much of a trim her nails need and notice where the quick begins. Now trim only the sharp tip of one nail, release your cat’s toe and quickly give her a treat. If your cat didn’t notice, clip another nail, but don’t trim more than two claws in one sitting until your cat is comfortable. Be sure to reward her with a special treat afterward. Please note, you may want to do just one paw at a time for the first couple of sessions.

    Clipping Schedule
    A nail-trimming every ten days to two weeks is a nice routine to settle into. If your cat refuses to let you clip her claws, ask your vet or a groomer for help.

    What Not to Do

  • If your cat resists, don’t raise your voice or punish her.
  • Never attempt a clipping when your cat is agitated or you’re upset. And don’t rush—you may cut into the quick.
  • Don’t try to trim all of your cat’s claws at one time.
  • Do NOT declaw. This surgery involves amputating the end of a cat’s toes and is highly discouraged by SNAP Cats. Instead, trim regularly, provide your cat with appropriate scratching posts and ask your veterinarian about soft plastic covers for your cat’s claws.
  • Bringing Home a New Kitty

    Bringing Home A New Kitty

    Going to a new home is one of the most stressful and frightening experiences in a cat’s or kitten’s life. It’s compared to the stress we would experience if our home burned down, we were forced from our jobs, and our friends and family disappeared – all in the same day. Some cats adapt readily to their new homes and are contentedly purring away in their new owners’ laps in a few hours, while others takes days or weeks. Regardless of whether your new pet comes from a shelter or a loving foster home, it will find you and your home strange and frightening. You can minimize the stress your new kitty experiences if you follow a few simple rules:

    1. Your new kitty should spend at least its first day and night in its own room (and at least a week if you have other cats/dogs. See #4 below). This can be any quiet room in your home – a bedroom or bathroom with a closed window is ideal. It should also be a room that you can spend a lot of time in to help the kitty transition. Being in its own room will allow the kitty to become accustomed to the sounds and smells in your home without the additional stress of confronting a complex physical environment. Place a litter box, bed, scratching post, food and water in this room. And make sure there is a place for the kitty to hide, i.e. under a bed, behind a chair, etc. And make sure the room is clean and void of anything the kitty could hurt itself on/with. Have all of this set up before bringing in your new kitty. Bring in the carrier containing your kitty, close the door to the room, and open the carrier. Allow the kitty to come out of the carrier on its own. DO NOT force the kitty out. If the kitty doesn’t want to come out when you’re in the room, leave the room for a while, then come back in to see if the kitty has left the carrier. If not, leave the kitty in the carrier with the carrier door open.

    This room is where the new kitty will stay until it’s ready to meet the rest of your home. You play with it in this room, introduce other family members to it in this room, and never take it out of this room for any reason. And never let other pets into this room while the new kitty is acclimating to it room.

    2. When left alone the kitty may cry anxiously. You can comfort it by talking to it quietly, petting it gently, and if it doesn’t seem too frightened, picking it up and holding it in you lap.

    3. If you have small children, it’s especially important that they leave the kitty alone during this time. Because small children make sudden loud noises and movements, they’re particularly terrifying to cats. Introduce children gradually. Ideally these visits should occur when the child is in a quiet, attentive mood. Tell the child, “We’re going to visit the new kitty now. We have to be very quiet and gentle, and move very slowly, so that the kitty will learn to trust us.”

    4. How soon you let the kitty out to see the rest of your home depends on the kitty and whether or not you have other pets. If you have no other pets, your new kitty is ready to come out of its room when you walk into the room and it’s no longer fearful of you, i.e. comes up to you to be pet, held, etc. If you have another cat, your new kitty should remain in its room for at least five-to-seven days, so they can get acquainted with each other by smelling each other under the door. The room will smell like the new kitty, and your other cat will treat the room as the newcomer’s territory. Your new kitty will thus have refuge when you finally open the door and let the cats meet face-to-face for the first time. If you have a dog, never leave the new kitty alone with the dog unsupervised. We have more information about introducing a new kitty to your dog.

    5. Once your kitty is ready to come out of its room, simply open the door and let it explore outside on it’s own pace. Never pick it up and carry it out. Never force it out. Let you new kitty explore on its own. And, once the kitty is out of the room exploring, NEVER close the door to the room behind it. If the kitty gets scared or startled, it’ll run back into the room to hide. If it can’t get back into its room it’ll scare the kitty even more.

    6. Once you observe that your new kitty only goes back into its room to eat, drink and use the litter box, you can then move its food and box to a permanent location. Make sure that your kitty knows where you moved its food and box. This can simply be done by picking your new kitty up and placing it next to the food/water and box. Never place your kitty in the litter box. This will scare it.

    7. Other tips:

    a. If you plan on feeding your new kitty a different type of food than it was previously eating, make the transition after the new kitty has acclimated to it’s room. It doesn’t need anymore stress in the first few days.
    b. If you plan to let your new kitty outside (not recommended unless you have a lot of property), don’t let it out for at least a month after bringing it home and/or it’s six months old. You want to make sure that your new kitty understands that your home is its new home. If it doesn’t understand this, once let outside, it’ll try to find the place from which you adopted it. And at six months old, your new kitty will be big enough to handle itself outside with other animals/cats.

    The confinement technique described here will avoid many problems such as failure of your kitty to find the litter box, running out the front door before the kitty recognizes you and your home as its new home, and hiding in places where you might not want it to (like under the washer). Your patience will be rewarded, and your new kitty who cowered under your bed for a week will become a loving family member who greets you at the door, brings you gifts (a catnip mouse, perhaps), and generally repays you tenfold with love and companionship.

    Bottle Feeding Kittens

    First, Cleanliness
    Young kittens must be protected from disease!! ALWAYS wash your hands before and after handling the kittens, and ALWAYS clean bedding and towels, and sterilize your bottles, nipples, brushes, or tube feeders in boiling water after each use!! If your kittens did not receive their mother’s colostrum (the watery milk the queen produces in the first couple of days after giving birth), your kittens are at an even higher risk as they did not receive the antibodies present in the colostrum. In that case, be sure to keep them separated from any other animals, also.

    Housing
    House your kitten(s) in a small room. A bathroom is perfect. At first they’ll only need an area for their bed. Then, as they grow, they’ll need areas for their food and litter box.

    First and foremost, kittens need to be kept warm and free from drafts. If not they can suffer hypothermia very quickly. A small box is perfect. Place towels in the box to create a cozy “nest.” You can place towels over the box (if needed) to keep the inside warmer. The bedding towels should be replaced frequently; immediately when wet. A heating pad – on low setting – can be placed under half of the area. This gives the kitten(s) the option of how much heat they require. Kittens need plenty of sleep, so the area that they’re in should encourage this.

    Bottle Feeding
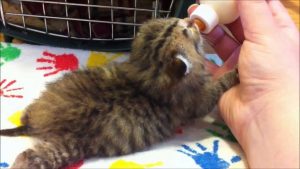
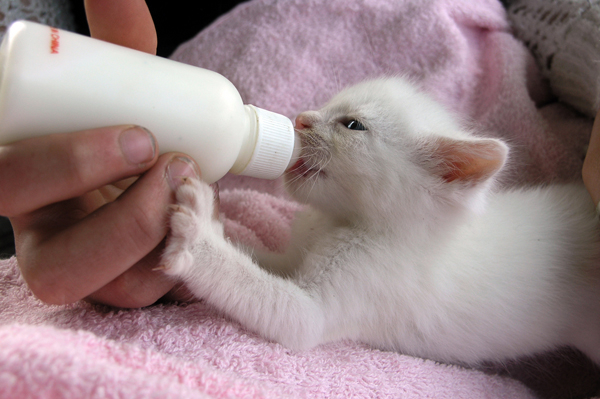
    Bottle feeding a kitten requires special nursers (bottle with nipple) designed for hand-feeding kittens. Make sure the kitten is on its stomach, even if it’s in your lap or on your tummy. DO NOT turn the kitten on its back to bottle feed, as this will cause the kitten to aspirate and possibly drown in the formula.

    Nipple of bottle: poke a small hole in the nipple with a very fine needle. Once the mixture is inside the bottle, turn the bottle over (nipple facing down) and gently squeeze. The formula should drip out but not run out. If the kitten gets too much formula too fast it can aspirate. Increase the hole size accordingly.

    Gently insert the nipple into the mouth of the kitten then slowly pull up and forward on the bottle so that the kitten will have its head slightly elevated and extended while nursing. Be sure the kitten is actually suckling by checking the level of formula in the nurser bottle and check the sides of the kitten’s mouth for excess formula.

    If the kitten doesn’t take the bottle, mix the formula with wet food and make a soup/slurry. This should interest the kitten. If not, make sure there’s wet & dry food and water available all of the time.

    How much to bottle feed the kittens? 
    It’s better to under-feed than over-feed a kitten in the first few days. A bottle-fed kitten will usually stop nursing when it’s full. If, however, you notice milk coming out of its nose, the milk is being delivered too fast, which means that the hole in the nipple is too large. (If the kitten continues to bubble its formula out of its nose each feeding, call us and we’ll have our vet check the kitten carefully to be sure the inside palate are of its mouth has fully developed.)

    Formula Temperature
    You should warm the formula before giving it to the kitten, to 99°-101°F (the body temperature of cats). The best way to do this is by putting the sterilized bottle into a warm bowl of water rather than using the microwave, which can cause “hot spots” in the formula.

    Bottle vs. Syringe
    Some kittens just won’t suck formula from a nippled bottle. In this case you should use a plastic syringe (without the needle of course!). From the newborn stage until the kittens are about 1-1/2 weeks old, use a 3 cc. syringe, and feed every 2 hours. At 1-1/2 weeks old, they are ready for the 6 cc. syringe size and feeding every 3 hours, and at about 3 weeks old, move them up to a 12 cc. syringe, feeding them at least every 4 hours. An average meal for a 3 week old kitten can vary from a single syringe full (12 fluid cc) to three syringes full (36 fluid cc) for a large and hungry kitten!!!

    Formula
    We use the powdered form of KMR (Kitten Milk Replacer) formula. While the powdered form is more economical, it does not always reconstitute as lump-free as needed to flow through the syringes. So make sure that the formula is thoroughly dissolved before feeding. We also recommend mixing the formula with goat milk instead of water – one part KMR to two parts goat’s milk. DO NOT USE COW MILK! This ensures that the kitten is getting all the needed vitamins, nutrients and minerals it needs to grow strong. You can buy goat’s milk at any grocery store.

    How much formula to give?
    Normally, it’s recommended that you give 2 tablespoons of liquid formula for every 4 ounces of body weight per day. For very young kittens, you’ll need to divide their total daily amount into six equal sized feedings. And yes, this does mean during the night, also! As the kittens grow, the number of feedings and their frequency can be decreased. Also as they grow, they can let you know better when they are actually hungry. Kittens that are not getting enough nourishment may cry continuously, suck on each other or on themselves, and they may have prominent hips or backbones.

    Do I need to burp the kitten?
    After each feeding, you’ll need to hold the kitten against your shoulder and gently burp it. Another technique is to hold the kitten so its back is against your chest and gently cuddle it under your neck while rubbing its tummy. A steady weight gain of about 10 grams (or 1/3 of an ounce) per day is recommended, but do not be surprised if a kitten may stay at the same weight for a day or two, then suddenly the weight gains are seen. After feeding, burping and weighing the kitten, check to see if the kitten’s bedding needs to be changed, and that the temperature is correct. Then, put the kitten back in the box so that it can sleep. A properly fed kitten will sleep through to the next feeding.

    Stimulating Elimination
    If properly fed, kittens will have a couple of firm, yellowish stools per day. Also after each feeding, you will need to gently massage and stimulate the anal and genital area with a sterile cotton ball or piece of gauze dipped in warm water. This will cause the kitten to urinate and have bowel movements, and it is very important that you continue to do this for the kitten until it is definitely using the litter box on its own, even though most kittens can control their own bowel movements at about 10 days old. The skin area is very delicate and may become raw or sore from your efforts. If this happens, apply a tiny dab of Preparation H ointment to the affected area after each stimulation. Keep in mind that your kitten will probably not have a bowel movement every feeding, and sometimes even skip a day. This should be fine as long as the kitten is growing, eating well, not showing any signs of distress, and urinating.

    Litter Box – Use a non-clumping litter
    Eventually, kittens will need a litter box. This usually happens when they start eating solid foods. A box with shallow sides is best. Some kittens learn to use the litter box on their own. Some you’ll need to teach. After they’ve eaten, place them in the box. They’ll learn to use the litter box very quickly after a few “lessons.” Make sure to keep the litter box as clean as possible, especially if you have multiple kittens. Disease spreads quickly in communal boxes.

    Socialization
    Socializing is an important aspect of foster care. A well socialized kitten finds a home faster than one that hides in the back of their cage. Newborn to 4 week-old kittens should be handled daily; but only for a short period of time. Kittens this age are easily fatigued. At 4 weeks of age they’ll begin to come to you for attention.

    Questions/Concerns
    Email us any time if you have questions, concerns or problems with your kitten(s). If it’s an emergency please go to your vet.